A Guide to Starters
Sourdough bakers rely on a convenient supply of strong, dependable starter. In this section, you'll learn to create a new starter, maintain a starter, and ensure its maximum effectiveness for baking.
Grow Your Own
You don't need to create your own starter. Any sourdough baker will be happy to give you a batch. You can even order dried starter online that is ready for a bake within a few days. However, making your own starter from scratch will help you master a crucial component of successful sourdough.
Equipment
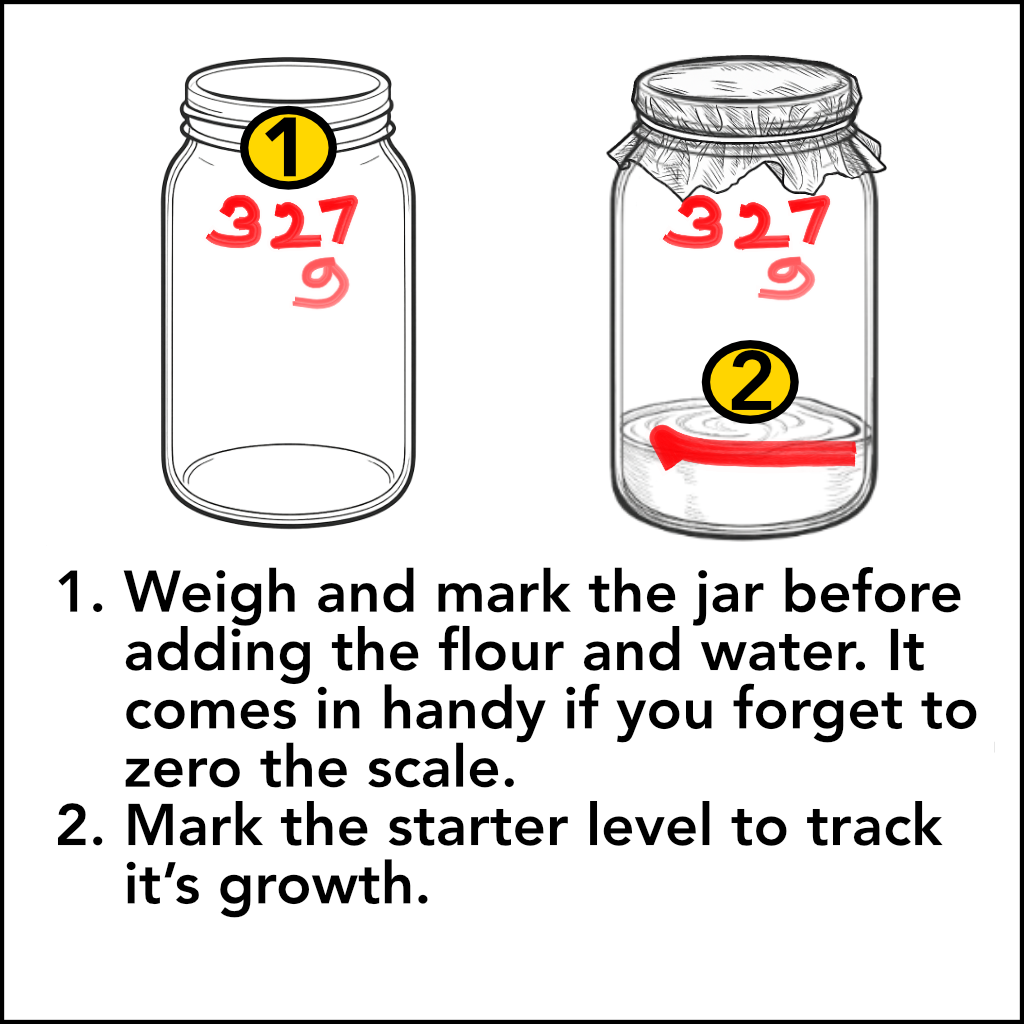
- One tall cylindrical jar (regular circumference top to bottom; e.g., standard peanut butter jar).
- Flour. We recommend bread flour.
- Water. Many sources recommend filtered water, but the Mildly Impaired Kitchen (MIPK) and most home bakers use tap water.
- Electronic kitchen scale ~$15–$25.
- Long handled spoon. The slim handle end is well suited for stirring the sticky mass, and the spoon end is useful for scraping down the high sides of the jar. Use a wood or plastic spoon for safety if your jar is glass.
Method
Day 1
- Add 100 g warm water.
- Add 100 g flour.
- Mix thoroughly.
- Cover loosely and leave on the counter.
Day 2
- Discard 100 g (half the 200 g total).
- Replace with 50 g warm water and 50 g flour.
- Mix well.
- Cover loosely.
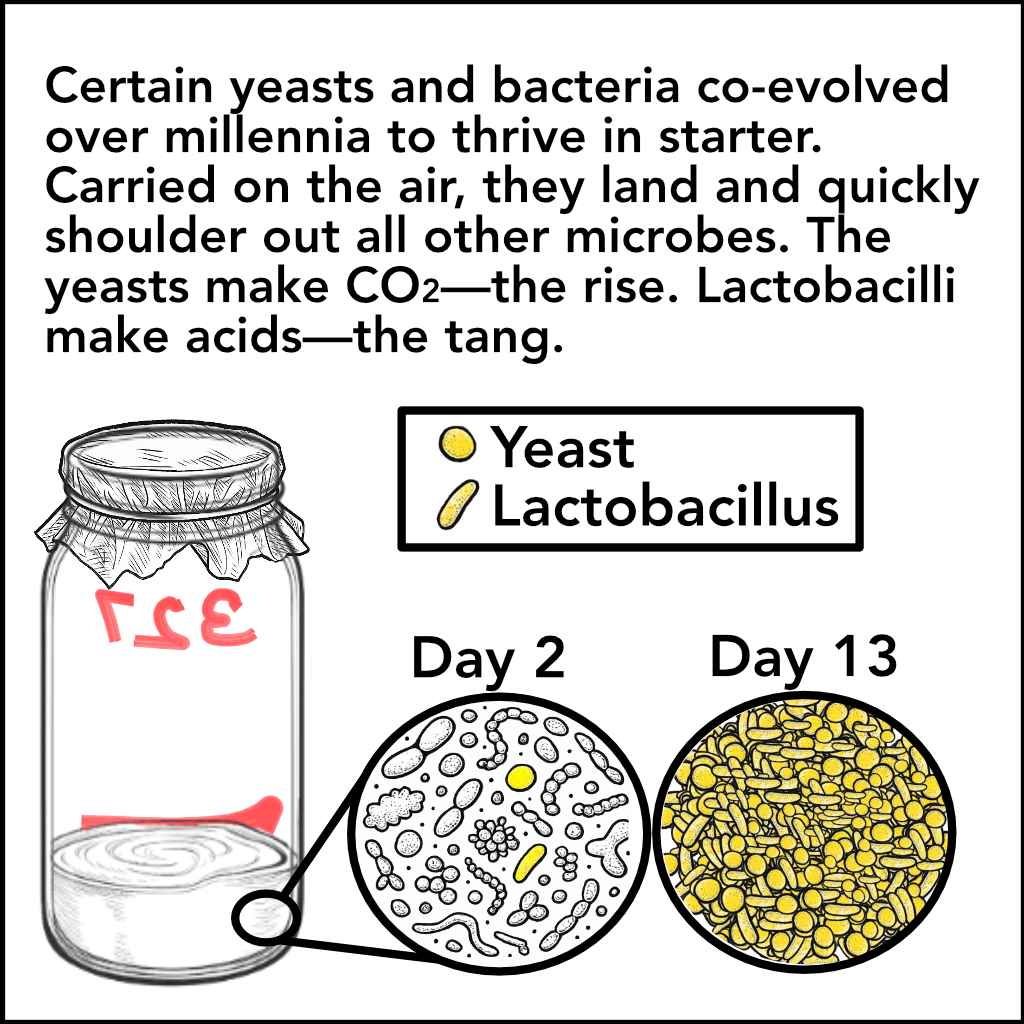
Day 3 to Maturity (~7 to 14 days)
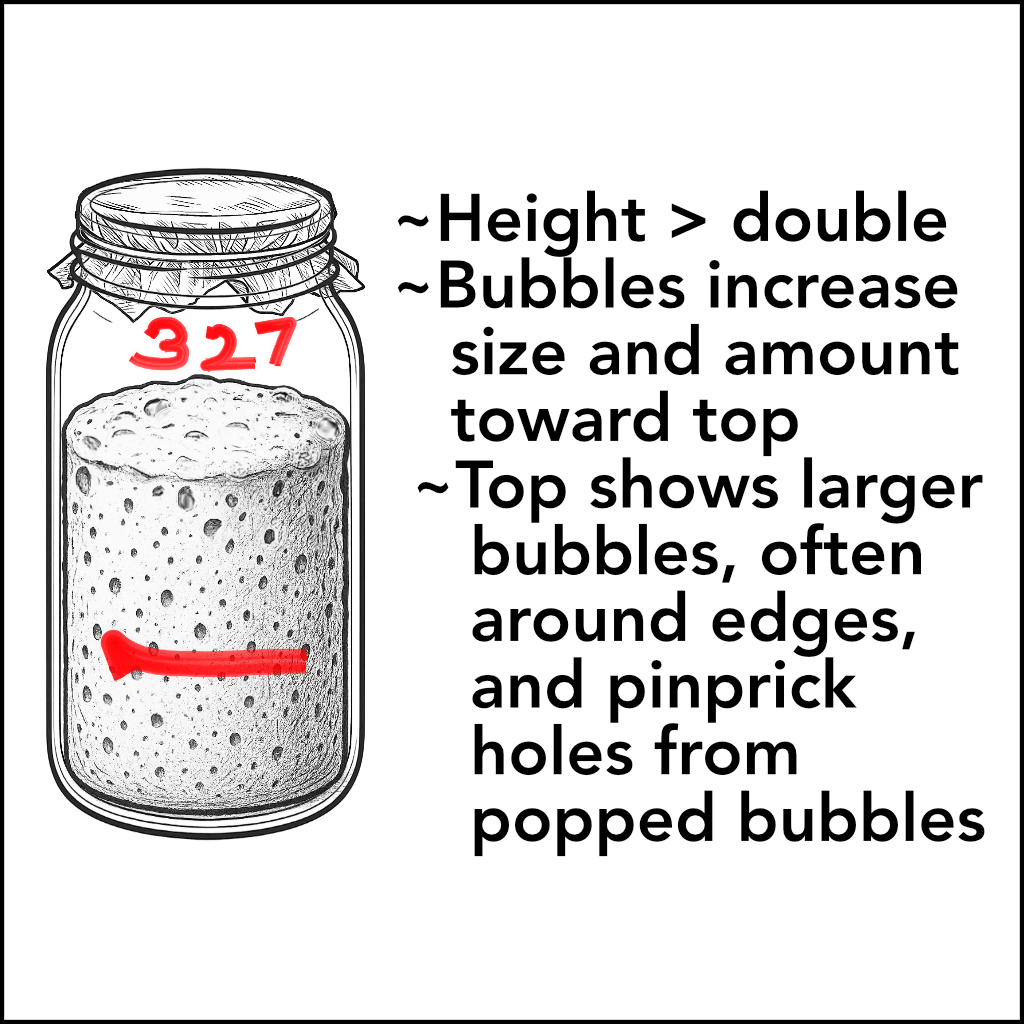
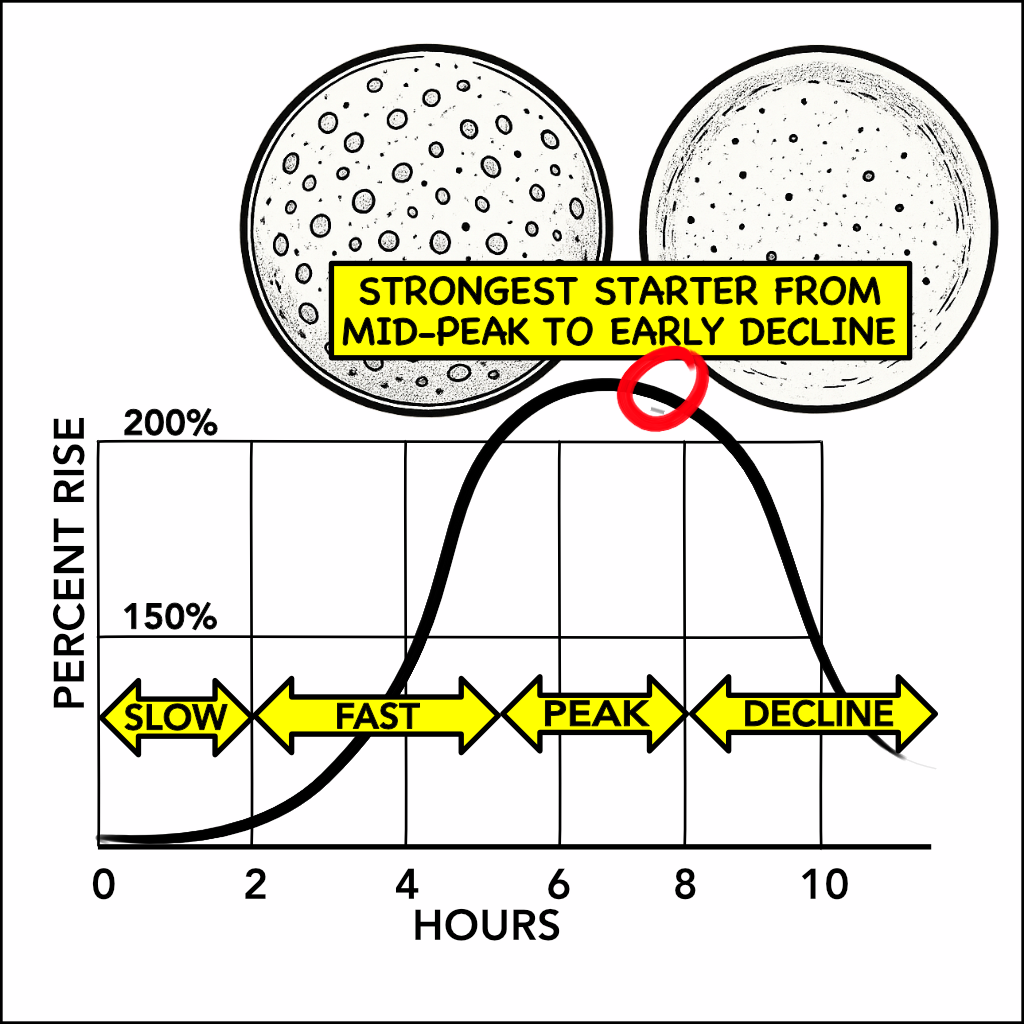
Feed daily as you did on Day 2. Check the starter 5–10 hours after feeding. You have a fully grown starter when you see:- Height is at least doubled
- Bubbles are numerous, tiny to small throughout, and the small bubbles are more numerous up higher in the column. The surface has many small to medium bubbles, occasional larger bubbles, and some pinprick holes where bubbles have popped. The largest bubbles often appear at the surface perimeter.
- The surface may be flat, mounded, or slumped (concave).
- A slump indicates that starter height has already peaked, and begun to recede. There are fewer bubbles on the surface, and pinprick holes are more numerous.
Comments
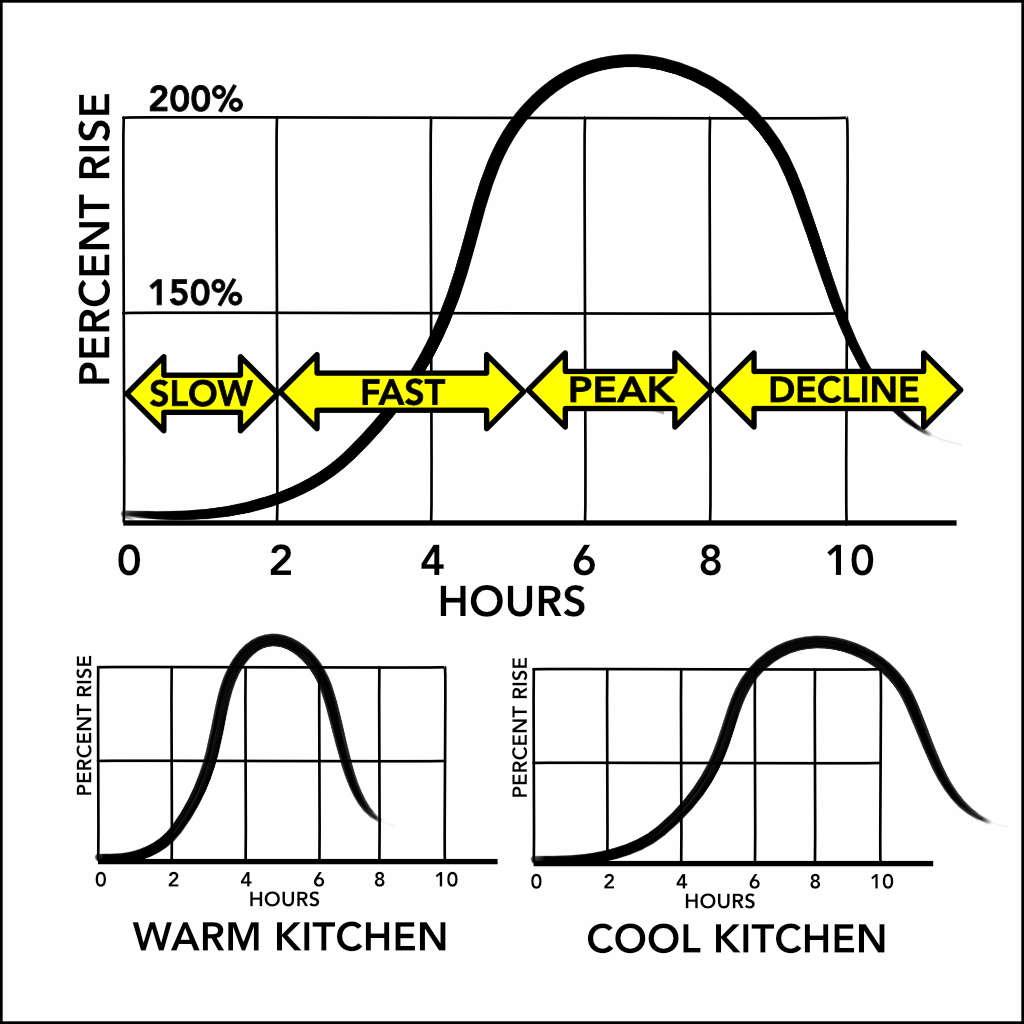
- The starter growth curve time estimates are broad approximations. Kitchen temperature is the most impactful variable on growth rate.
- Discard doesn’t necessarily mean throw away. Many use starter discard for pancakes, pizza dough, etc.
Troubleshooting
- No activity: Usually climate-related; growth at the start is slower in cold temps, high altitude, and low humidity. Temperature is most important. Try a warmer spot, and wait another week.
- Smells odd: Ignore it. That’s fermentation at work.
- Two weeks and nothing: Wait a few more days, or:
- Start over.
- Get starter from a friend, or friend of a friend. Any sourdough baker will be happy to start you off.
- Order dried mature starter online—it’s ready to bake in 2–3 days.
Starter Maintenance
Routine care and feeding.
Method
Day 1
- Discard half your starter, and replace the discarded portion with equal weights of water and flour. Example (assuming 200 g total): discard 100 g, add 50 g warm water, add 50 g flour, and mix well.
- After feeding, refrigerate the starter.
- Feed once a week or every other week. The more you bake, the more often you’ll feed.
Comments
- Fridge storage means fewer feedings—cheaper and more convenient.
- Infrequent bakers can feed monthly or less and still revive the starter quickly (see “Hooch” below).
Troubleshooting
- Hooch is the grayish, alcoholic liquid layer atop a neglected starter. Pour off what you can, and stir in the rest. It may take 2–4 feeding days to revive. Don’t refrigerate until fully revived.
Preparing Starter for a Bake
Focus on building the strongest possible starter for your loaf.
Important Starter Readiness Review: Read the 'Day 3 to Maturity' portion of the above 'Growing Your Own' section.
Day 1: The day before you mix your recipe.- Transfer half the total starter amount you need from your refrigerated jar. If using 210 g MIPK starter, transfer 105 g starter from the fridge to a new jar, then add to that new jar 52.5 g warm water, 52.5 g good quality bread flour, and mix well.
- Mark the level on the jar with a marker or rubber band.
- Mark the current time on the jar.
- Leave loosely covered on the counter.
- Don't forget to replenish the water and flour in your refrigerated jar.
- When the starter is fully active, mark the new level and the current time.
- Feed as you normally would: Discard half the starter (105 g). Add 52.5 g warm water, add 52.5 g bread flour, and mix well.
- When the starter is fully active, it's ready to mix in the recipe.
Comments
- You get an estimate of the time to maturity, which helps you plan the next day.
- Feeding two days in a row strengthens the starter. It matures faster and seems a bit more active.
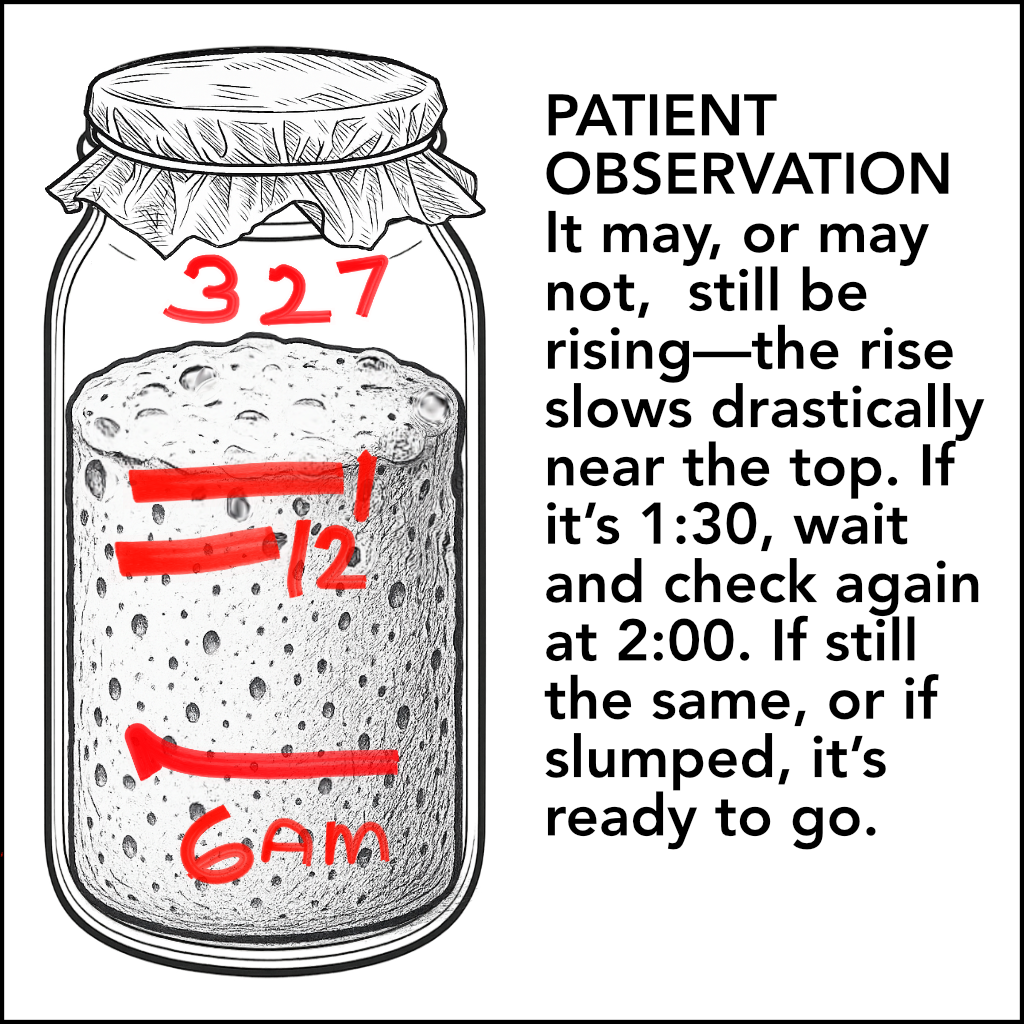
Bottom Line on Identifying Starter Readiness
- Height is your primary indicator. Keep careful watch while the starter growth slows significantly as it nears Peak.
- If you're uncertain whether it has stopped growing, mark the current level and time. Then check again in 30 minutes to see if any growth has occured. Keep marking and checking as necessary.
- When it hasn't gotten any higher, or has begun to slump, your starter is ready.
- Mix your ingredients immediately.

Starter Timing Hacks
- Reduce bulk fermentation times with high percentage starter. MIPK's 210 g/15% starter recipe results in half the bulk fermentation time as the original 105 g/7.5% starter it replaced. Larger starters would presumably decrease BF times further.
- Speed up starter maturation with warmth. Put the jar in a warm place. One MIPK trick is to put the starter in the oven, turn on the oven and wait 90 seconds before turning the oven off. Then leave the starter in the now slightly warm oven.
- Slow down starter maturation with the refrigerator. If your starter isn't ready and you need to be somewhere else, put the jar in the refrigerator. It will continue to grow, but very slowly, for the next 6 hours.
Starter/Levain Confusion and Description
Recipes customarily refer to starters smaller than 150 g as starter, and larger mixes as levains. But the true definitional difference between them is that a Levain is a starter mixed in preparation for a bake. This differentiation is confusing because all starters are mixed in preparation for a bake. Many home sourdough bakers now simply avoid the term levain.
Whether starter or levain, it's useful to know how to categorize them. They are classified according to the proportion of total recipe flour. The MIPK 210 g starter is a 15% starter because it contains 15% of the 700 g total flour amount in the recipe (700 g x 0.15 = 105 g). Starter percentage is an important metric because larger sourdough starters can significantly shorten bulk fermentation time.